Back in November, when the world was a lot more normal and racing bikes was still a thing, I picked up a 2019 Giant Revolt Advanced 2 that was going to be my demo bike for the year. I know what you're thinking, but it's got skinny tires and it's made of Carbon! Yes it is both of those things but I was pretty excited to give it a go despite its slender appearance. This would be the first bike I've had out on gravel with a tire measuring less than 2.1" since I gave up the cross bike on 38mm tires for my first Fat Bike.

As with all of my reviews this will be mostly my likes and dislikes about the Revolt and less about all the technical specs. There are plenty of those our there if that's your thing but this will not be one of those.
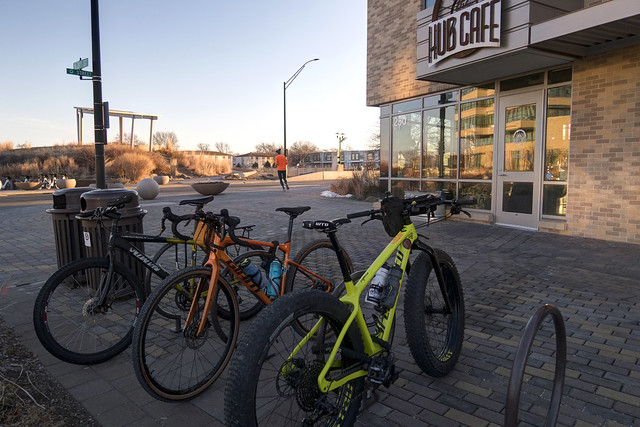
The Revolt retails for just a touch under $2,700 for the 2019 Advanced 2 model, there are less expensive options available from Giant if you just choked on your morning coffee at the price tag. While I have not ridden the less expensive models I would assume that they will be as capable as the Advanced 2 but with a lower parts spec to bring the price down, there is even an aluminium version if carbon just isn't your bag, baby. I had hoped to have a few races on the bike already, with several more slated in the near future so that I could share those experiences but then the world got turned upside down and everything has been cancelled or postponed. Despite all of the restrictions on life right now I have managed to get in about 360 miles on the Revolt to this point, so I do feel like I have a decent handle on the bike and with that lets dive into what I like and don't like about the bike.


The first thing that had to go was the stock Giant Contact saddle, this is not necessarily a knock on Giant or the Contact saddle, it just wasn't for me... however, as far as I'm concerned almost all stock saddles are the first thing someone should look at replacing. A saddle is a very personal thing and very rarely is your butt going to be happy with the saddle on the bike when you buy it. The saddle is going to be your main contact point with the bicycle and if your butt ain't happy, nothing about riding the bike is going to be sunshine and rainbows. I swapped mine out for the tried and true WTB Silverado with Ti rails, these saddles just seem to disappear beneath my ample rumpus and that's a good thing since the last thing you want to be paying attention to all day is how your butt is feeling. I also swapped out the standard tires for a set of WTB tan walled 42mm Resolute tires set up tubeless and so far they have performed flawlessly.


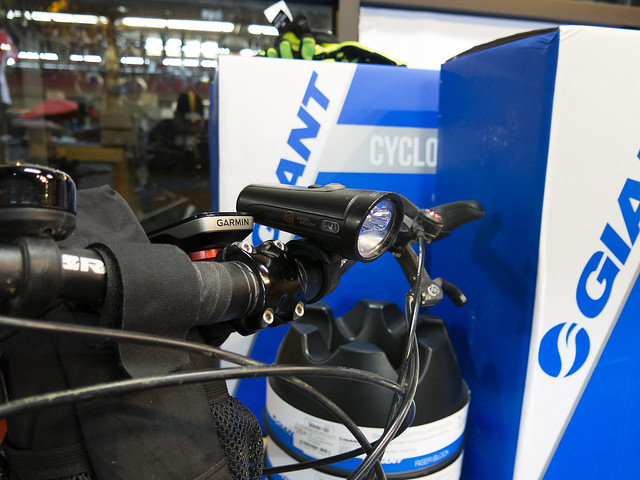
One of the other things about the bike that I didn't really care for was this big hunk of stuff up front, the larger metal portion is how Giant deals with cable to hydraulic brakes. The brakes on the Advanced 2 are cable actuated at the levers (this saves money as non hydraulic levers are less expensive) then run through this hydraulic reservoir and end up with hydraulic calipers. It seems like a pretty good idea and it seems to work well enough but with the computer mount and light mounts bolted onto the reservoir it makes it nearly impossible to run an handle bar bag, which I do often on drop bar bikes. This is a minor thing as it looks like you could remove both the computer mount and light mount if you could find shorter mounting bolts for the stem, currently they all mount with one super long bolt and I could not get it tight enough to keep the handlebars from moving without at least the computer mount on the bike. I took off the light mount, tossed out the idea of running a handle bar bag, slapped on the Garmin and away I went. Things were good, or so I thought, then I got a Wahoo Roam to replace the Garmin 820 I had been running and that's where more issues with the hydraulic cluster arose. Giant ships the bike with all these extra mounts for different computers or accessories, something for almost any situation... except one that works on the Wahoo.
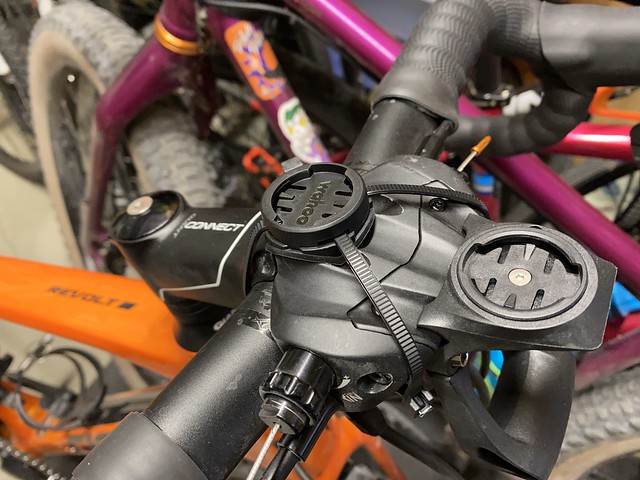

Adapt, improvise, overcome and if that doesn't work rig it up with zip ties or duct tape, in my case it was zip ties. Not an idea setup but it did allow me to run the Wahoo while I figured out how to fix the problem permanently.

As it turned out Wahoo had the answer already in the form of this little Garmin to Wahoo adapter. The problem is that the Garmin and Wahoo mounting "teeth" are 90 degrees from one another so mounting a Wahoo on a Garmin mount puts the computer sideways and that's just no good. This little $14 adapter corrects that problem in a matter of seconds, it might seem like it's a bit pricey but it's one adapter at $14 and then you get to use all of your already existing Garmin mounts if you were a convert like I was. Bicycle computer mounts can be 3 times or more the cost of the adapter and if you are already invested in 5-6 of the Garmin mounts on you fleet, well tat adds up quickly. This little adapter, I would recommend buying two in case one goes missing, allows you to instantly be able to use those Garmin mounts while you slowly replace the mounts on your bikes. I have an affinity for the K-Edge mounts, that I had before the switch to Wahoo but the fact that all you need is a new mounting insert for the Wahoo ($5 vs $35 or more) has me liking them even more now.


The adapter simply is inserted and locked into place much like you would your cycling computer, then the Wahoo gets mounted to that adapter and, viola, you have a Wahoo you can actually use for rides. With the increased popularity of Wahoo I am guessing that Giant will have a Wahoo insert that come with the bikes soon, if they don't already have them available but when I bought the Wahoo adapter they did not have such an insert available through Giant. Of note, one nice thing about the cable to hydraulic brakes is the adjust-ability, if you look at the first picture here you'll see a barrel adjuster with a + sign. Moving that barrel adjuster towards the plus moves the brake pads in toward the rotors, moving toward the - sign, that you cannot see here, moves the pad away from the rotors. Super simple and seems to work as advertised to help fine tune your brake pads.
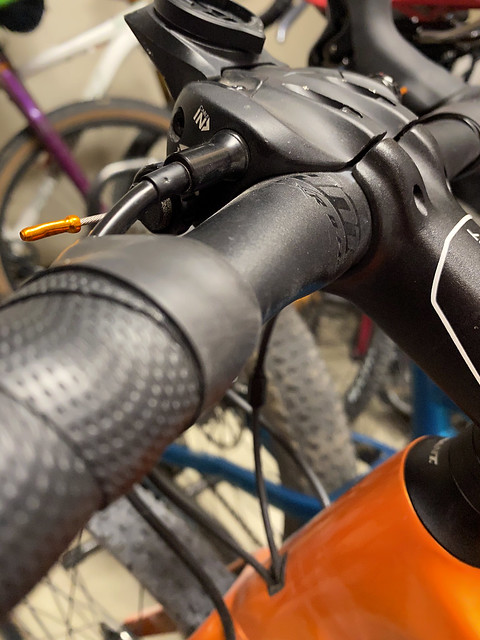

Why not just use a normal mount and be done with it you might be asking... well, Giant uses their own Contact XR D-Fuse handlebars on the Revolt and they are more oval than they are round so mounting a traditional computer mount to them is not really an option without figuring out a way to turn an oval bar into a round surface for mounting. If this was my everyday bike I am sure a person with a knack for solving problems could figure out a way to fabricate some sort of rubber or plastic spacer to make that oval/round conversion but for me it wasn't worth the effort.
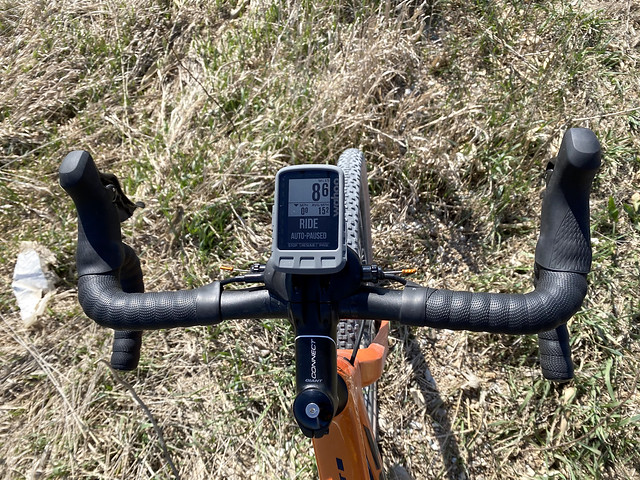
Between the oval shape and the slight backward sweep from the stem, they are supposed to help reduce some of the gravel vibration that you feel at the bars. They seem to do a pretty good job of that, I have not noticed my hands and forearms getting tired from trying to hold on during normal gravel riding like I would with more traditional bars. That is about all of the things I didn't like about the bike, it might seem like a lot but in reality if this was my bicycle and not a demo, a lot of these things would be simple fixes.


The bike comes as a increasingly rare 2 X 11 setup, running the Shimano workhorse 105s. Shifting has been good but I forgot how noisy a front derailleur can be on rough gravel, the carbon probably does not help in that regard. One thing I do like about the Shimano front derailleur is that the shift lever has a built in "trim" shift for lack of a better term. What this does is help to compensate for the chain angle, if you're still in the big ring up front and the biggest cog in the back you end up with a pretty decent chain angle and some chain rub on the front derailleur can happen. The trim shift gives you the ability to slightly shift down the front derailleur without completely shifting to the small ring up front. Ideally you would use the big ring, little ring combo more effectively and not need that trim shift but it's nice to have it for real world riding.


Now then, aside from the few small nitpick items mentioned above. This bike flies on gravel, it's probably the fastest gravel bike I've ever ridden and it'll make you a faster gravel rider; I almost guarantee it. It certainly has opened my eyes to what it's like to have a light, quick, modern day carbon gravel bike; something I thought I'd never really be interested in but Giant got a lot right with this bike and it has me wondering if I need something like this in my permanent fleet. The carbon has a way of taking some of the harshness out of wash boards and the geometry inspires confidence. It's a shame that it looks like there might not be a gravel race season this year, it would have been fun seeing what the Revolt could do, I suppose I still could but we all know that there's just something about a race environment that makes you give just a little bit more. Don't take my word for it however, Cycle Works has plenty of Giant Revolt models on the floor, swing a leg over one and give it a go for yourself.